Flink-ESB Message Gateway Tutorials
Use case: calling JMS services over HTTP
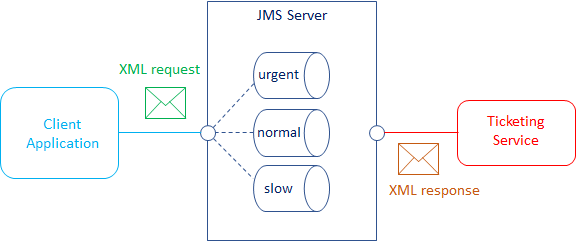
Original situation: there is a ticketing service, available over JMS transport on 3 different JMS queues: "urgent", "normal" and "slow"
Tickets put into "urgent" queue are processed most rapidly. Tickets with prio 2 and 3 are expected on "normal" queue. Tickets with the lowest priority are exchanged over "slow" queue
Format of messages: XML. There is a schema file describing format of ticket requests and responses
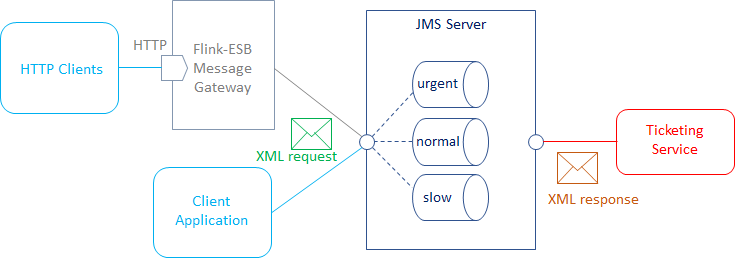
Objective: add possibility to call the service over one HTTP POST url
The same message format should be used. Request XMLs must be parsed against schema file. In case parsing fails: an error should be thrown to the calling HTTP client.
Tickets should be put automatically on 3 different JMS queues depending on ticket priority ("priority" element within XML request message)
Prio 1 tickets must go to "urgent" queue, prio 2 and 3: into "normal" queue, and prio 4: into "slow" queue
Estimated costs:
Programming efforts: 0
Administrator efforts: 15 minutes
Step 1: defining JMS destinations in Flink-ESB Message Gateway Config Console
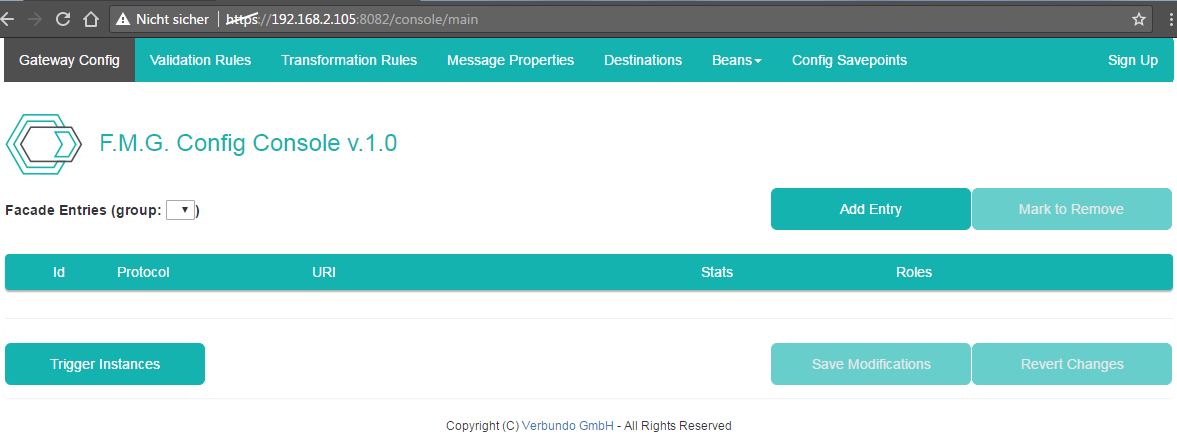
 Open Flink-ESB Message Gateway Config Console in the browser. Default URL: https://localhost:8082. Login with default username/password: admin/admin. You should see now a main page with no config entries yet created as on picture below:
 Click on "Destinations" tab and press "Add Entry" button.
 Enter data as on the picture below: "Destination Id" : 1001 (or any unique Id), "Protocol" : JMS, "MEP" : REQ_REPLY, "Destination Expression" : 'urgent'. !!! Make sure to enclose "Destination Expression" value in single quotes !!!
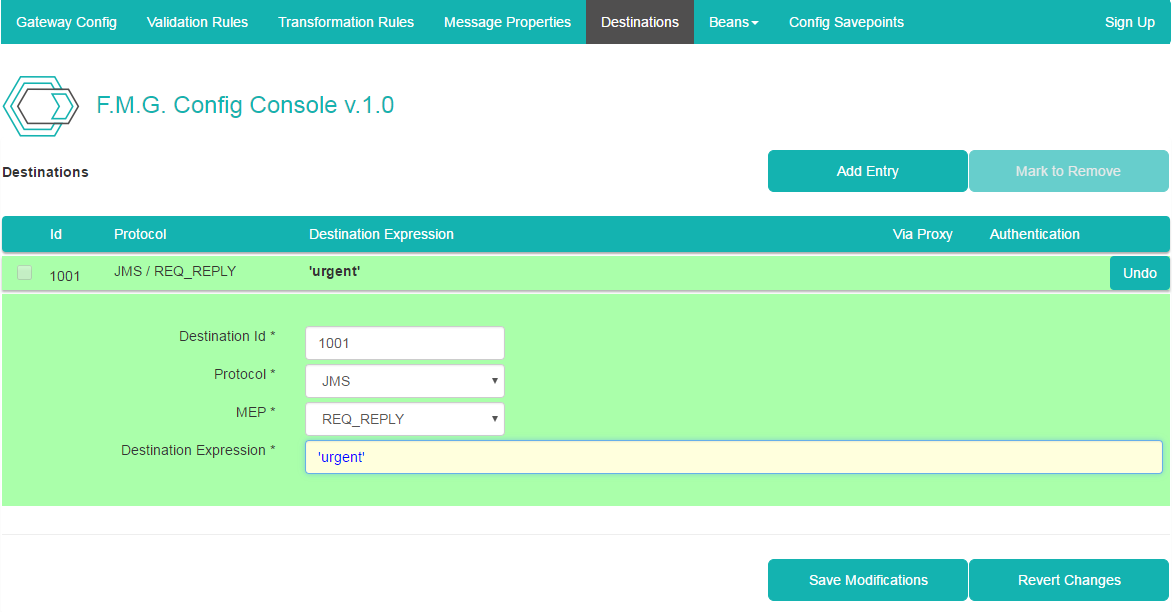
 Click on added row to hide details panel. Click "Add Entry" button again and specify details for the second destination: "Destination Id" : 1002 (or any unique Id), "Protocol" : JMS, "MEP" : REQ_REPLY, "Destination Expression" : 'normal'.
 Hide details panel. Click "Add Entry" button and specify details for the third destination: "Destination Id" : 1003 (or any unique Id), "Protocol" : JMS, "MEP" : REQ_REPLY, "Destination Expression" : 'slow'.
 Hide details panel of the third destination. Check now the data of all three destinations. It should look like on picture below:
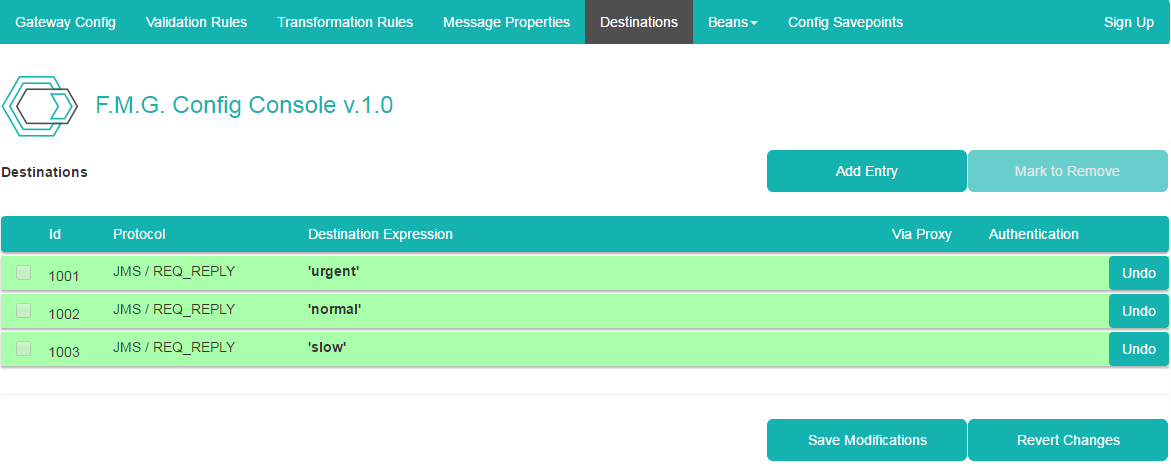
 If you found an error on some row, click on that row to unhide details panel and fix the data. Now click "Save Modifications" to save new destinations
Step 2: defining validation rule (parsing against XSD schema file) in Flink-ESB Message Gateway Config Console
 Click on "Validation Rules" tab and click "Add Entry" button. Type data as on picture below: "Rule Id" : 1001 (or any unique Id), "Rule Type" : SCHEMA, "Expression or Filename" : 'D:/programming/xsd/ticket.xsd' (use your local path to the schema file)
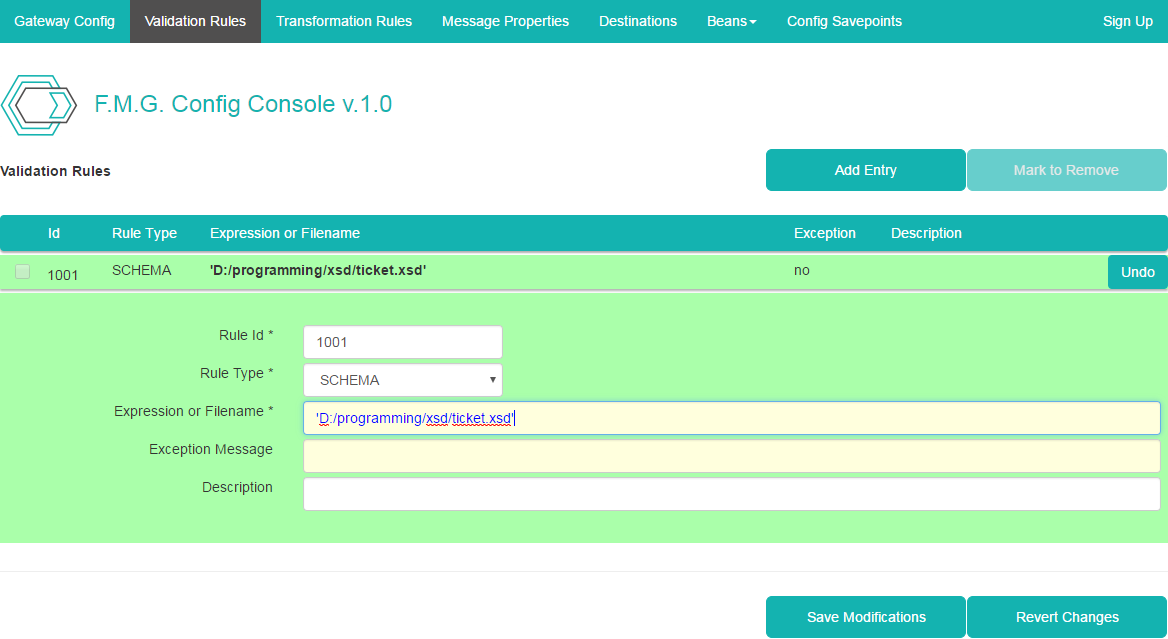
 Now click "Save Modifications" to save a validation rule
Step 3: creating façade entry and assigning a validation rule and the destinations to it in Flink-ESB Message Gateway Config Console
 Click on "Gateway Config" tab and click "Add Entry" button. Type data as on picture below: "Config Id" : 1001 (or any unique Id), "Method" : POST, " URI" : /service/ticket. Leave all other fields as they are.
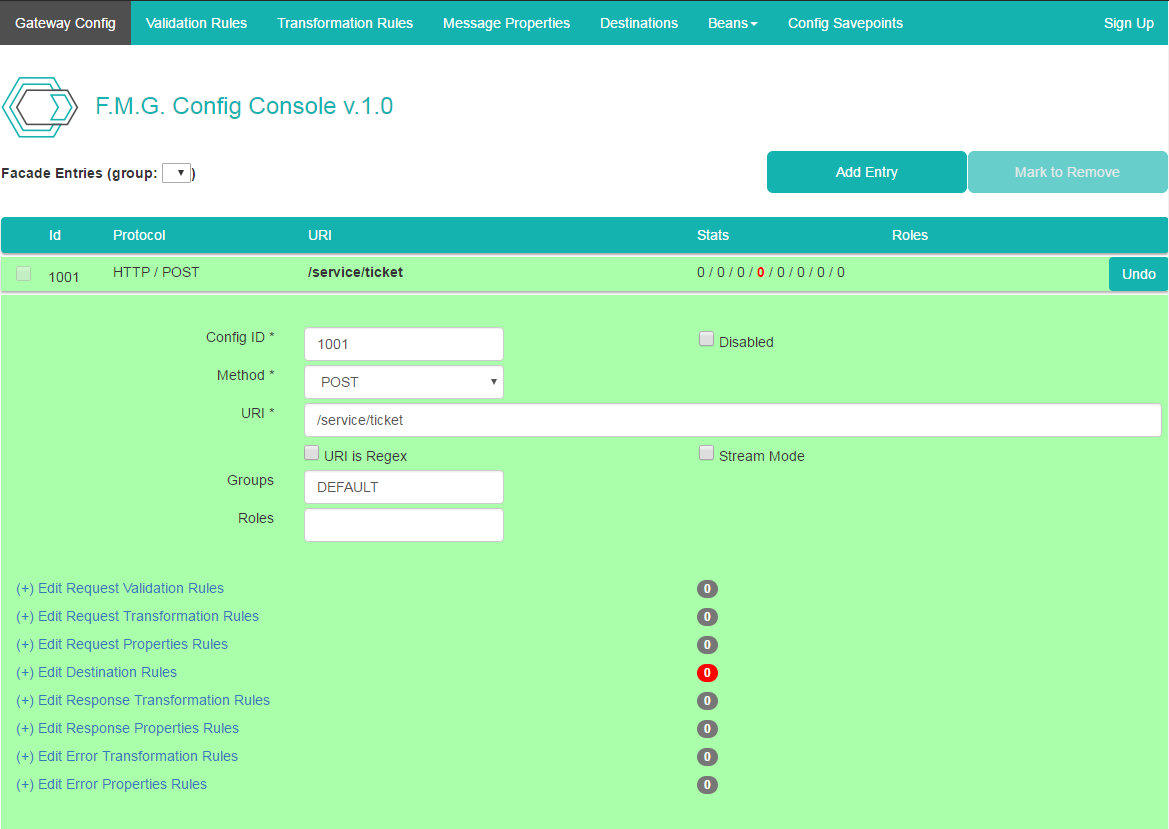
 Now press "Edit Request Validation Rules" link and then select "Show all rules" checkbox. This should unhide a validation rule created in the previous step. Select a checkbox on the left side of this rule to assign it to façade entry (it changes color from grey to black) as on picture below:
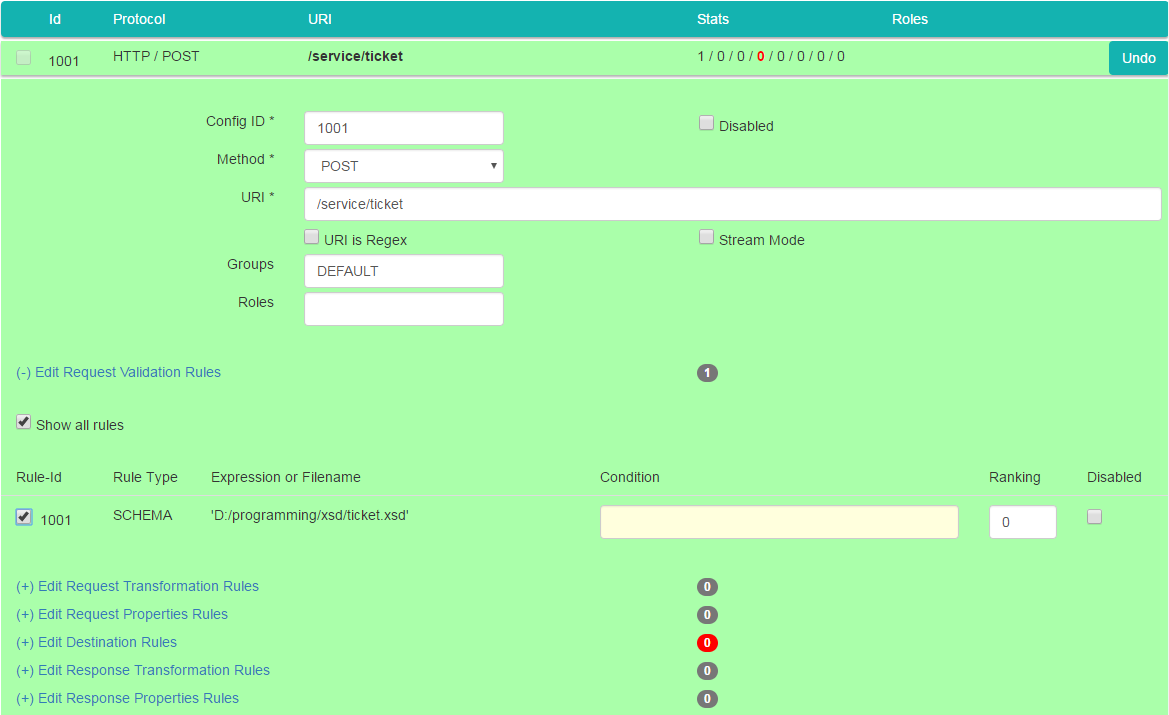
 Click on "Edit Destination Rules" link and then select "Show all rules" checkbox. This should unhide 3 destinations created in the step 1. Select 3 JMS destinations and type data as on picture below: "Condition" for rule 1 : xpathIgnoreNamespace(property['request'], '//priority')=='1', "Ranking" for rule 1 : 10, "Condition" for rule 3 : xpathIgnoreNamespace(property['request'], '//priority')=='4', "Ranking" for rule 3 : 5

 What it means: a message gateway will select a proper destination out of 3 assigned destinations following these rules: 1) order destinations by ranking (destination with the highest ranking tried first); 2) validate condition and see whether it returns 'true'. If it does - current destination is selected and a request is sent to this destination. If 'false' is returned', a next destination is checked. This continues until the last destination (with the lowest ranking) is reached. Since it has no condition, it always returns 'true'. Literally it all means: documents with "priority" element having value "1" are sent to the first destination, documents with "priority" element having value "4" are sent to the third destination. All others (priority 2 and 3) are sent to the second destination
 Click on façade entry row to hide all details. Make sure it looks like on picture below:

 If errors found, click on façade entry row to reveal details panel, correct the data. Now press "Save Modifications" button to save changes
Step 4: posting configuration to the running instances of Flink-ESB Message Gateway
 Click on "Gateway Config" tab if not there already, and click "Trigger Instances" button. Confirm a message box by pressing "OK"
Step 5: verifying functionality using Flink-ESB Admin Console
 Open Flink-ESB Admin Console in the browser. Default URL: https://localhost:8443/console/start. Login using your account/password (default after installation: admin/admin)
 Click on "Applications Overview" to expand it. Now you should see an instance name. Click on triangle on the left side of the instance name to expand it. You should see now applications installed on that instance. Click on the triangle beside "Message Gateway" application and click on "Routes"
 Now you should see the routes. Click on "from-HTTP-1001" route, where "1001" is Id of façade entry. Now you should see following:
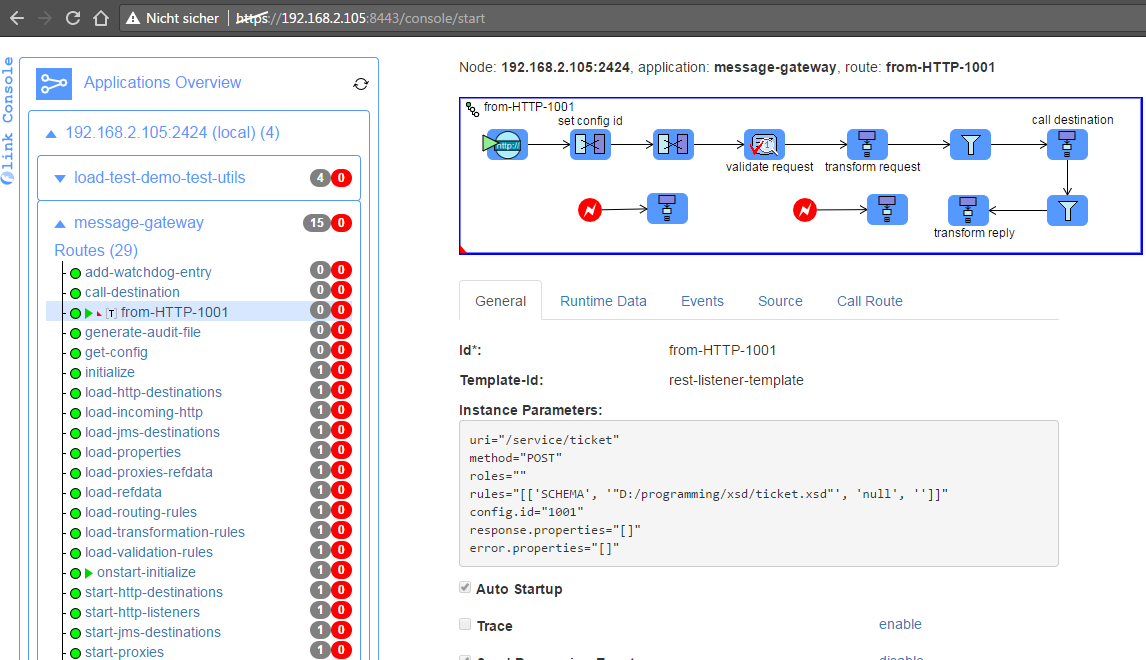
 Click on "Call Route" tab on the right panel right below the graphical presentation of the route.
 Type '' in the "Payload" field, and paste the content of sample XML request between single quotes.
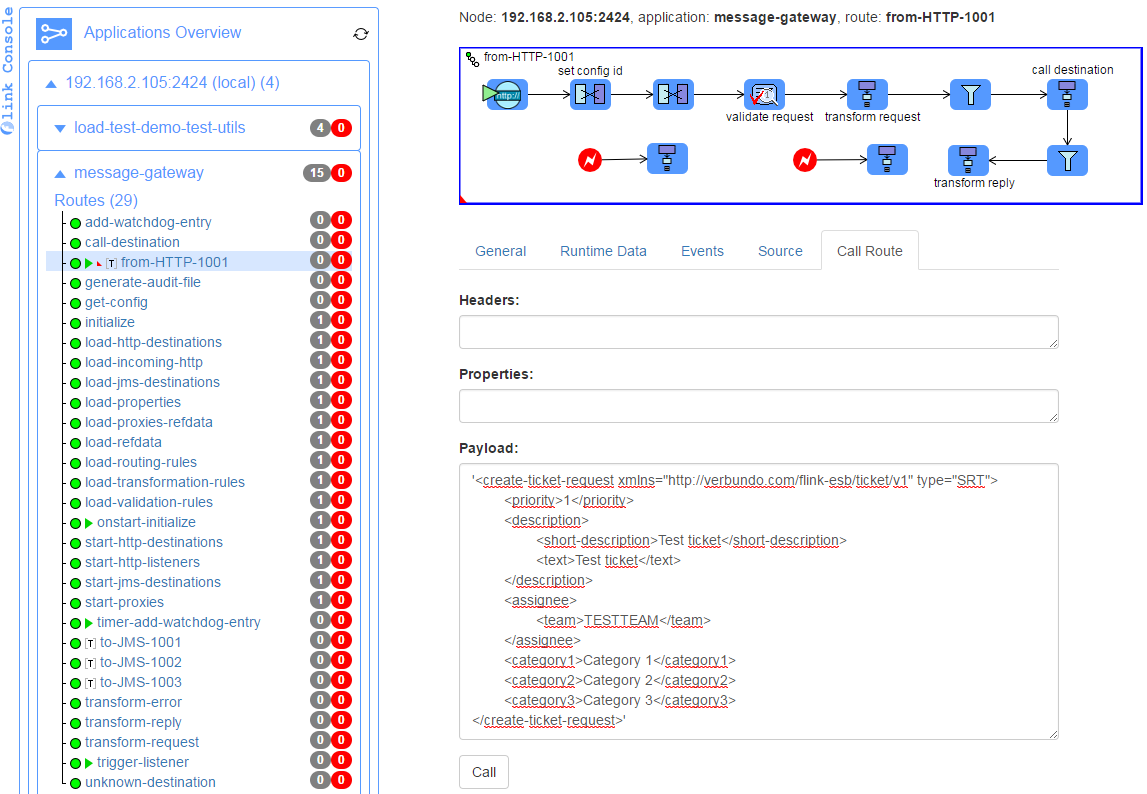
 Press "Call". Now you should see a response:
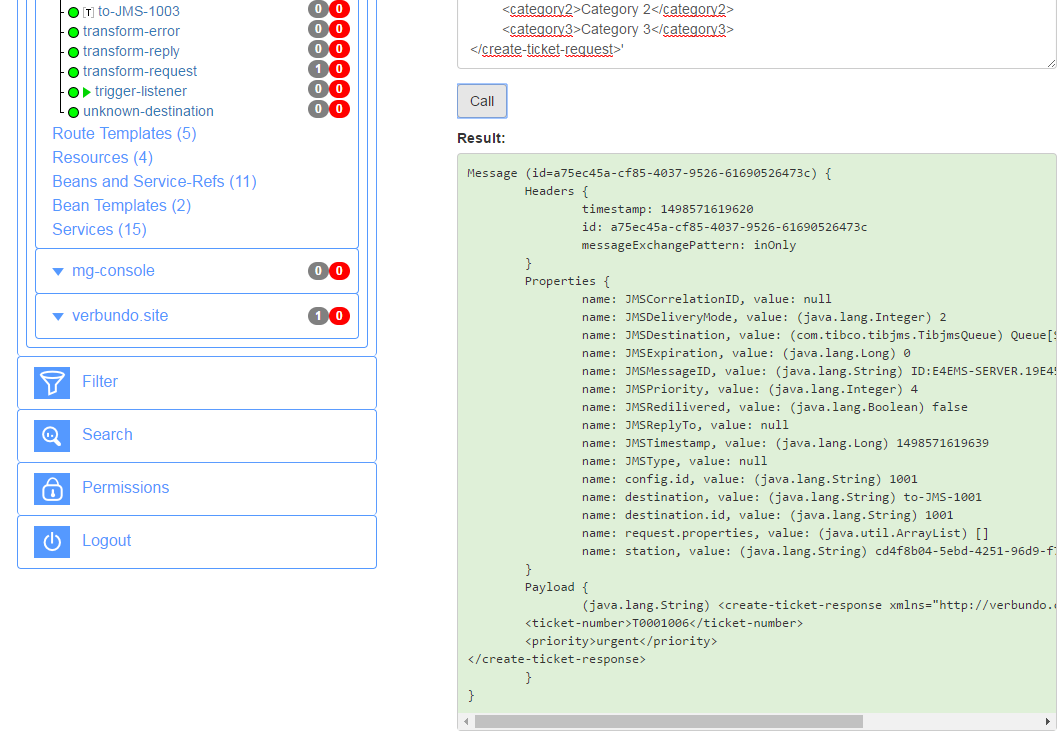
 Make sure "destination.id" property in the response matches destination Id you've specified in Message Gateway Config Console.
 Change priority in the request to "2" and press "Call" again. Check response and the value of "destination.id" property. Repeat this with priority "3" and "4"
