Flink-ESB Message Gateway Tutorials
Use case: adding new message formats to existing services using Flink-ESB Message Gateway
Original situation: there is a service, that can be called using HTTP protocol. This service outputs data in XML format.
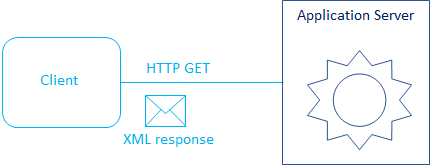
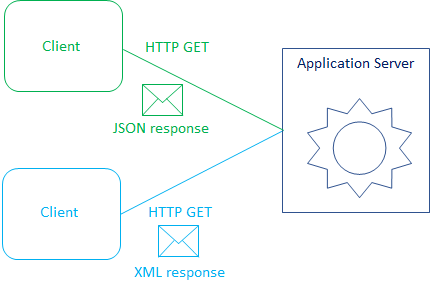
Objective: add possibility for asking the service to output data in different format, for example JSON.
Format of the output should be specified in URL as "format" query parameter. In case this query parameter is not present, a default XML format is used for output.
Estimated costs:
Programming efforts: 0
Administrator efforts: 15 minutes
For this tutorial a service is used, created in the Message Gateway: adding REST API to SOAP services tutorial.
Of course, you can use any other service which outputs XML documens for this tutorial.
Step 1: defining the structure of JSON message format
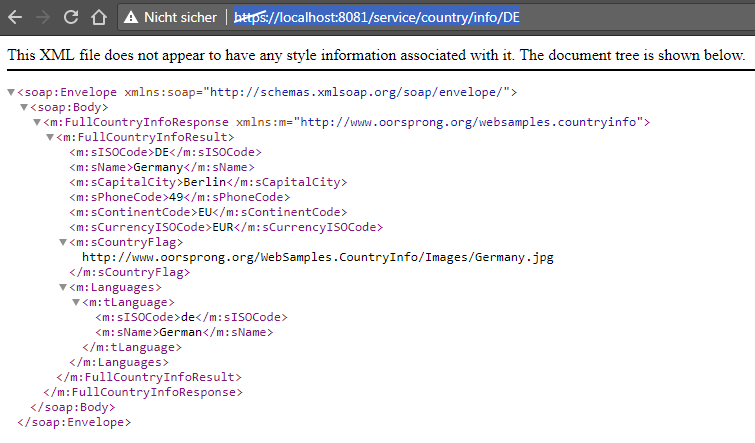
 Open the browser and type URL https://localhost:8081/service/country/info/DE (or whatever IP and port you have for message gateway). You should get an output as on the picture below:
 Let's define the format of JSON message to be:
{
	"ISOCode" : "",
	"sName" : "",
	"sCapitalCity" : "",
	"sPhoneCode" : "",
	"sContinentCode" : "",
	"sCurrencyISOCode" : "",
	"sCountryFlag" : "",
	"Languages" : [
		{
			"sISOCode" : "",
			"sName" : ""
		}
	]
}
Step 2: creating response tranformation rule in Flink-ESB Message Gateway Config Console
 As the current message format is XML, the simplest way to convert XML to some other format, is with XSLT. So we will use XSLT transformation in this tutorial.
 Start a text editor and create a new file in it. Paste folowing content into the editor:
<?xml version="1.0"?>
<xsl:stylesheet version="1.0"
xmlns:soap="http://schemas.xmlsoap.org/soap/envelope/"
xmlns:m="http://www.oorsprong.org/websamples.countryinfo"
xmlns:xsl="http://www.w3.org/1999/XSL/Transform">
<xsl:output method="text" encoding="UTF-8" indent="no"/>
<xsl:template match="/">{
	"ISOCode" : "<xsl:value-of select="soap:Envelope/soap:Body/m:FullCountryInfoResponse/m:FullCountryInfoResult/m:sISOCode"/>",
	"sName" : "<xsl:value-of select="soap:Envelope/soap:Body/m:FullCountryInfoResponse/m:FullCountryInfoResult/m:sName"/>",
	"sCapitalCity" : "<xsl:value-of select="soap:Envelope/soap:Body/m:FullCountryInfoResponse/m:FullCountryInfoResult/m:sCapitalCity"/>",
	"sPhoneCode" : "<xsl:value-of select="soap:Envelope/soap:Body/m:FullCountryInfoResponse/m:FullCountryInfoResult/m:sPhoneCode"/>",
	"sContinentCode" : "<xsl:value-of select="soap:Envelope/soap:Body/m:FullCountryInfoResponse/m:FullCountryInfoResult/m:sContinentCode"/>",
	"sCurrencyISOCode" : "<xsl:value-of select="soap:Envelope/soap:Body/m:FullCountryInfoResponse/m:FullCountryInfoResult/m:sCurrencyISOCode"/>",
	"sCountryFlag" : "<xsl:value-of select="soap:Envelope/soap:Body/m:FullCountryInfoResponse/m:FullCountryInfoResult/m:sCountryFlag"/>",
	"Languages" : [
		<xsl:for-each select="soap:Envelope/soap:Body/m:FullCountryInfoResponse/m:FullCountryInfoResult/m:Languages/m:tLanguage">{
			"sISOCode" : "<xsl:value-of select="m:sISOCode"/>",
			"sName" : "<xsl:value-of select="m:sName"/>"
		}
		<xsl:choose><xsl:when test="position() != last()">,</xsl:when><xsl:otherwise></xsl:otherwise></xsl:choose>
	</xsl:for-each>
	]
}
</xsl:template>
</xsl:stylesheet>
 Save a file as "CountryInfoResponseToJson.xslt" in some folder. The best approach is to have a common folder for all XSLT files.
Step 3: defining a transformation rule for the response in Flink-ESB Message Gateway Config Console
 Open Flink-ESB Message Gateway Config Console in the browser. Default URL: https://localhost:8082. Login with default username/password: admin/admin
 Click on "Transformation Rules" tab. Enter data as on the picture below: "Rule Id" : 1002 (or any unique Id), "Rule Type" : XSLT, "Filename" : D:/programming/xslt/CountryInfoResponseToJson.xslt (replace path with your local path, or better replace it with a project variable).
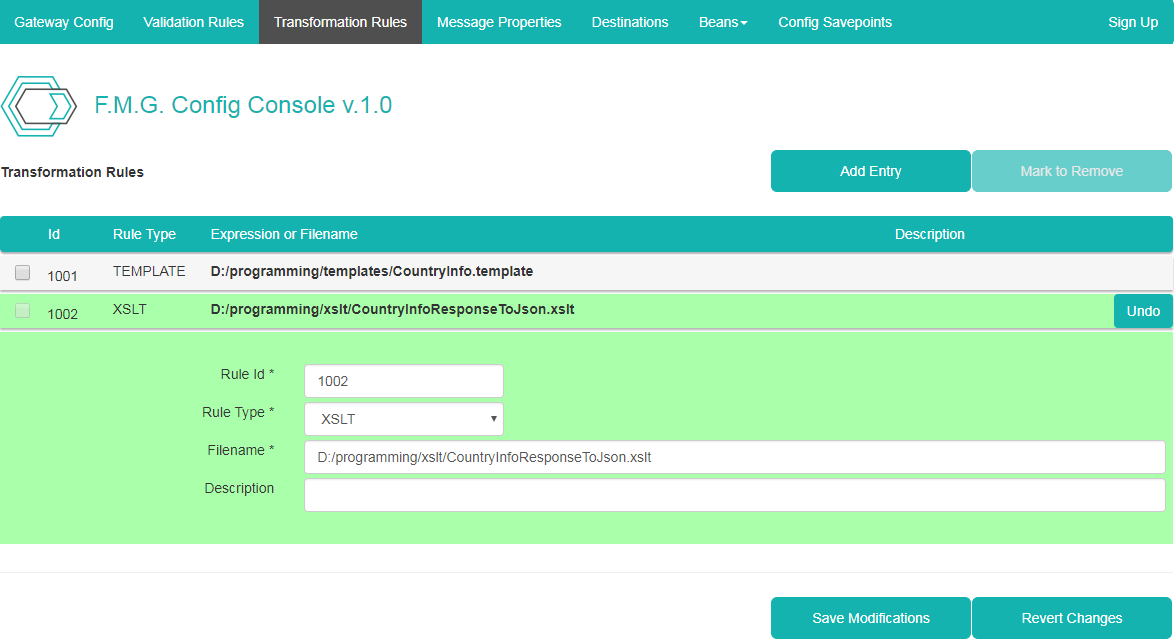
 Now click "Save Modifications" to save a transformation rule.
Step 4: assigning transformation rule to façade entry in Flink-ESB Message Gateway Config Console
 Click on "Gateway Config" tab and click on the row with "Config Id" 1001 (or whatever Id you've assigned to façade entry with URI /service/country/info/{country}) to unhide details panel.
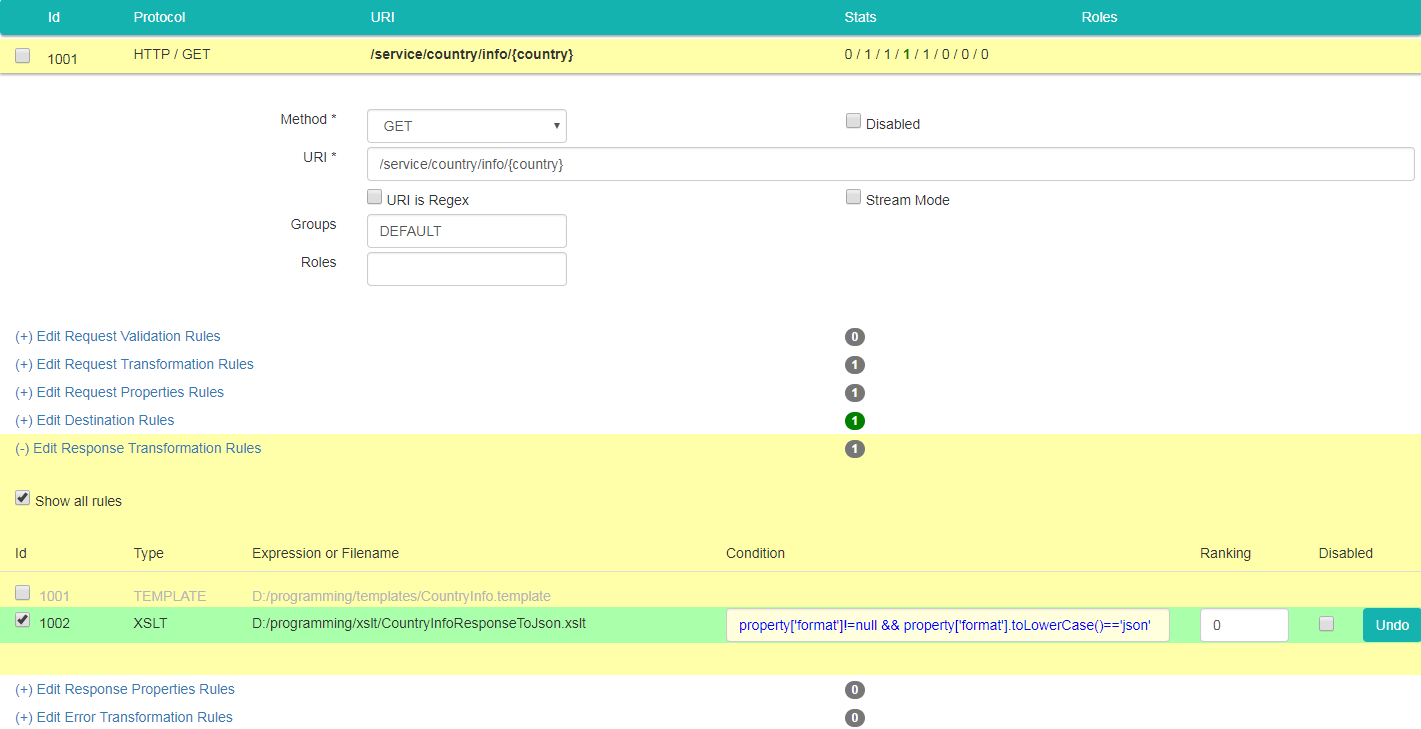
 Click on "Edit Response Transformation Rules" link, select "Show all rules" checkbox and select a checkbox on the left side of rule with Id 1002 (or whatever Id you've assigned to XSLT transformation created in the previous step).
 Specify "Condition" as property['format']!=null && property['format'].toLowerCase()=='json'. This makes sure a transformation rule is applied to the response only of there is a message property with name "format" and a value json (matching all cases).
 The data should look like on picture below:
 Now click "Save Modifications" to save changes.
Step 5: posting configuration to the running instances of Flink-ESB Message Gateway
 Click on "Gateway Config" tab if not there already, and click "Trigger Instances" button. Confirm a message box by pressing "OK"
Step 6: verifying functionality using browser
 Open the browser and type URL https://localhost:8081/service/country/info/DE (or whatever IP and port you have for message gateway). You should get an output as on the picture below:

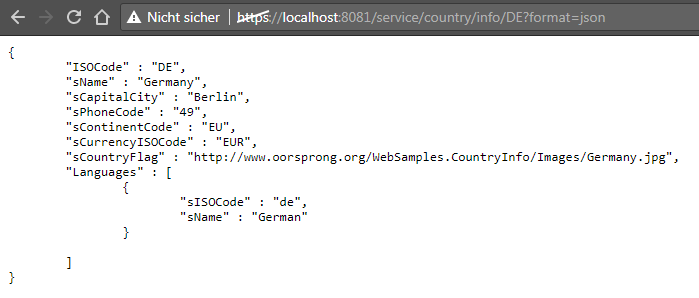
 Now try this URL: https://localhost:8081/service/country/info/DE?format=json. This time you should get a response in JSON format as on picture below:
Step 7: adding an appropriate "Content-Type" header to the response
 Even though the service works, and is able to output data in 2 different formats, there is still one important thing missing.
 A client software gets information about a format of the response using the value of "Content-Type" HTTP header. So let's make sure a service passes the right "Content-Type" header for each of 2 possible formats.
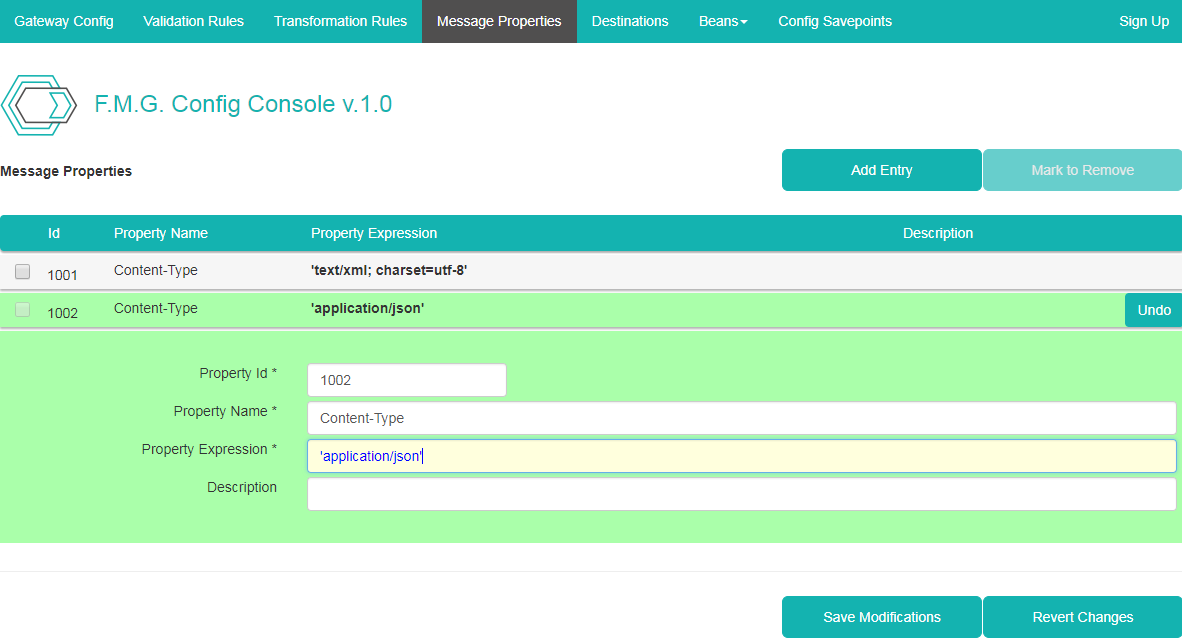
 Go to Flink-ESB Message Gateway Config Console on the browser and click on "Message Properties" tab. Press "Add Entry" button, and type data as on picture below: "Id" : 1002 (or any unique Id), "Property Name" : Content-Type, "Property Expression" : 'application/json':
 Now click "Save Modifications" to save message property.
 Click on "Gateway Config" tab and click on the row with "Config Id" 1001 (or whatever Id you've assigned to façade entry with URI /service/country/info/{country}) to unhide details panel.
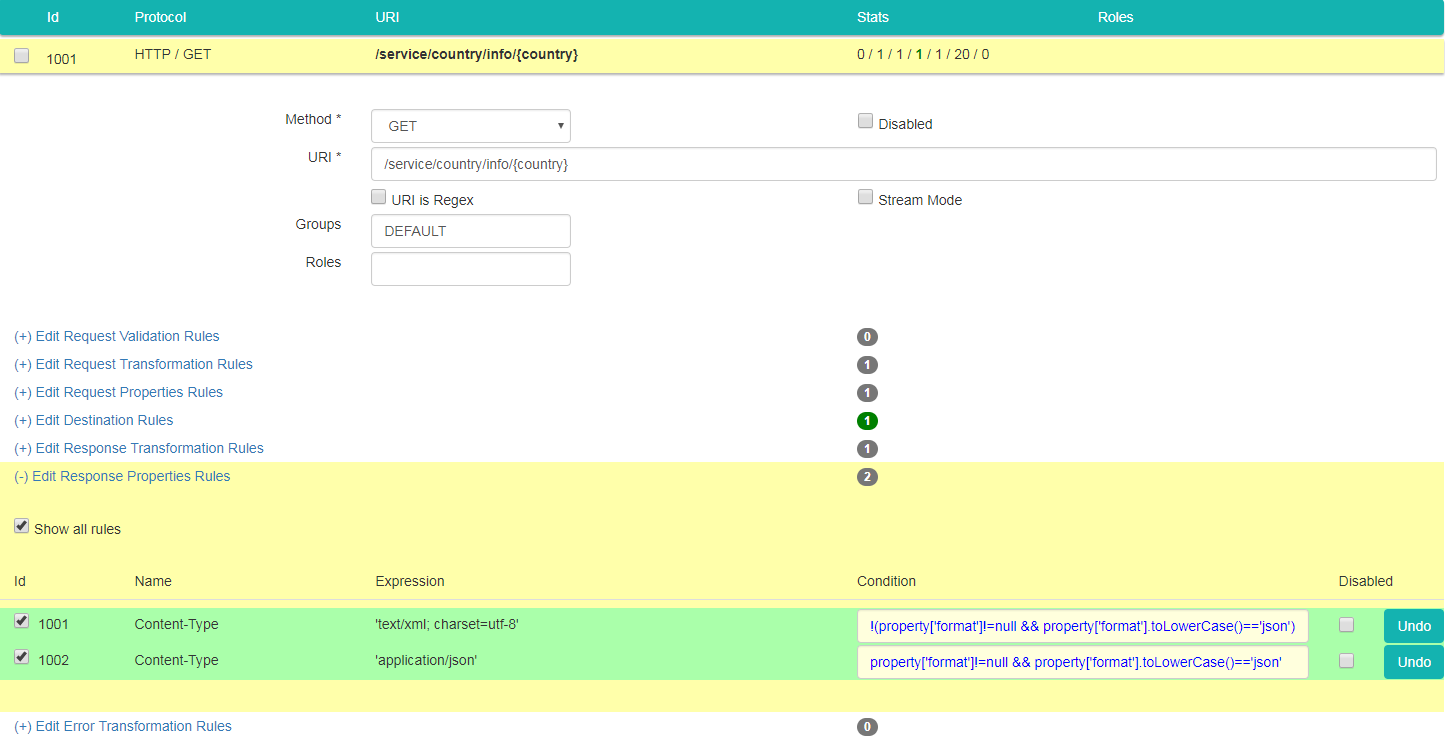
 Click on "Edit Response Properties Rules" link, select "Show all rules" checkbox and select a checkbox on the left side of properties with Id 1001 and 1002 (or whatever Ids "Content-Type" properties with values 'text/xml; charset=utf-8' and 'application/json' have).
 For the property with the value 'text/xml; charset=utf-8' specify this condition: !(property['format']!=null && property['format'].toLowerCase()=='json').
 For the property with the value 'application/json' specify this condition: property['format']!=null && property['format'].toLowerCase()=='json'.
 A data should look like on picture below:
 Now click "Save Modifications" to save changes and then press "Trigger Instances" button.
Step 8: verifying functionality using curl or browser
 Type curl -k -i https://192.168.2.105:8081/service/country/info/DE command and press "Enter". You should see output as on picture below:
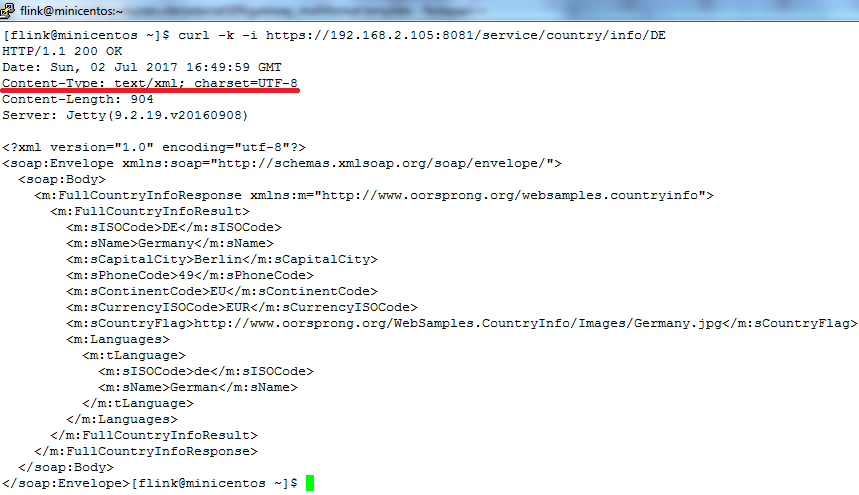
 Now try this: curl -k -i https://192.168.2.105:8081/service/country/info/DE?format=JSON. This time you should get:
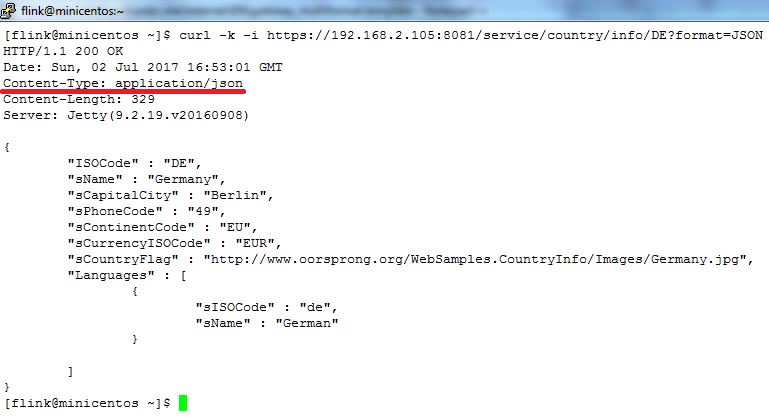
 This proves, that service passes now correct "Content-Type" HTTP header for each message body type.
